> ## Documentation Index
> Fetch the complete documentation index at: https://docs.lynxssp.com/llms.txt
> Use this file to discover all available pages before exploring further.
# Campaign Information
When firstly creating a campaign on the Lynx SSP Platform, you will need to prepare and enter some information or data in the following form:
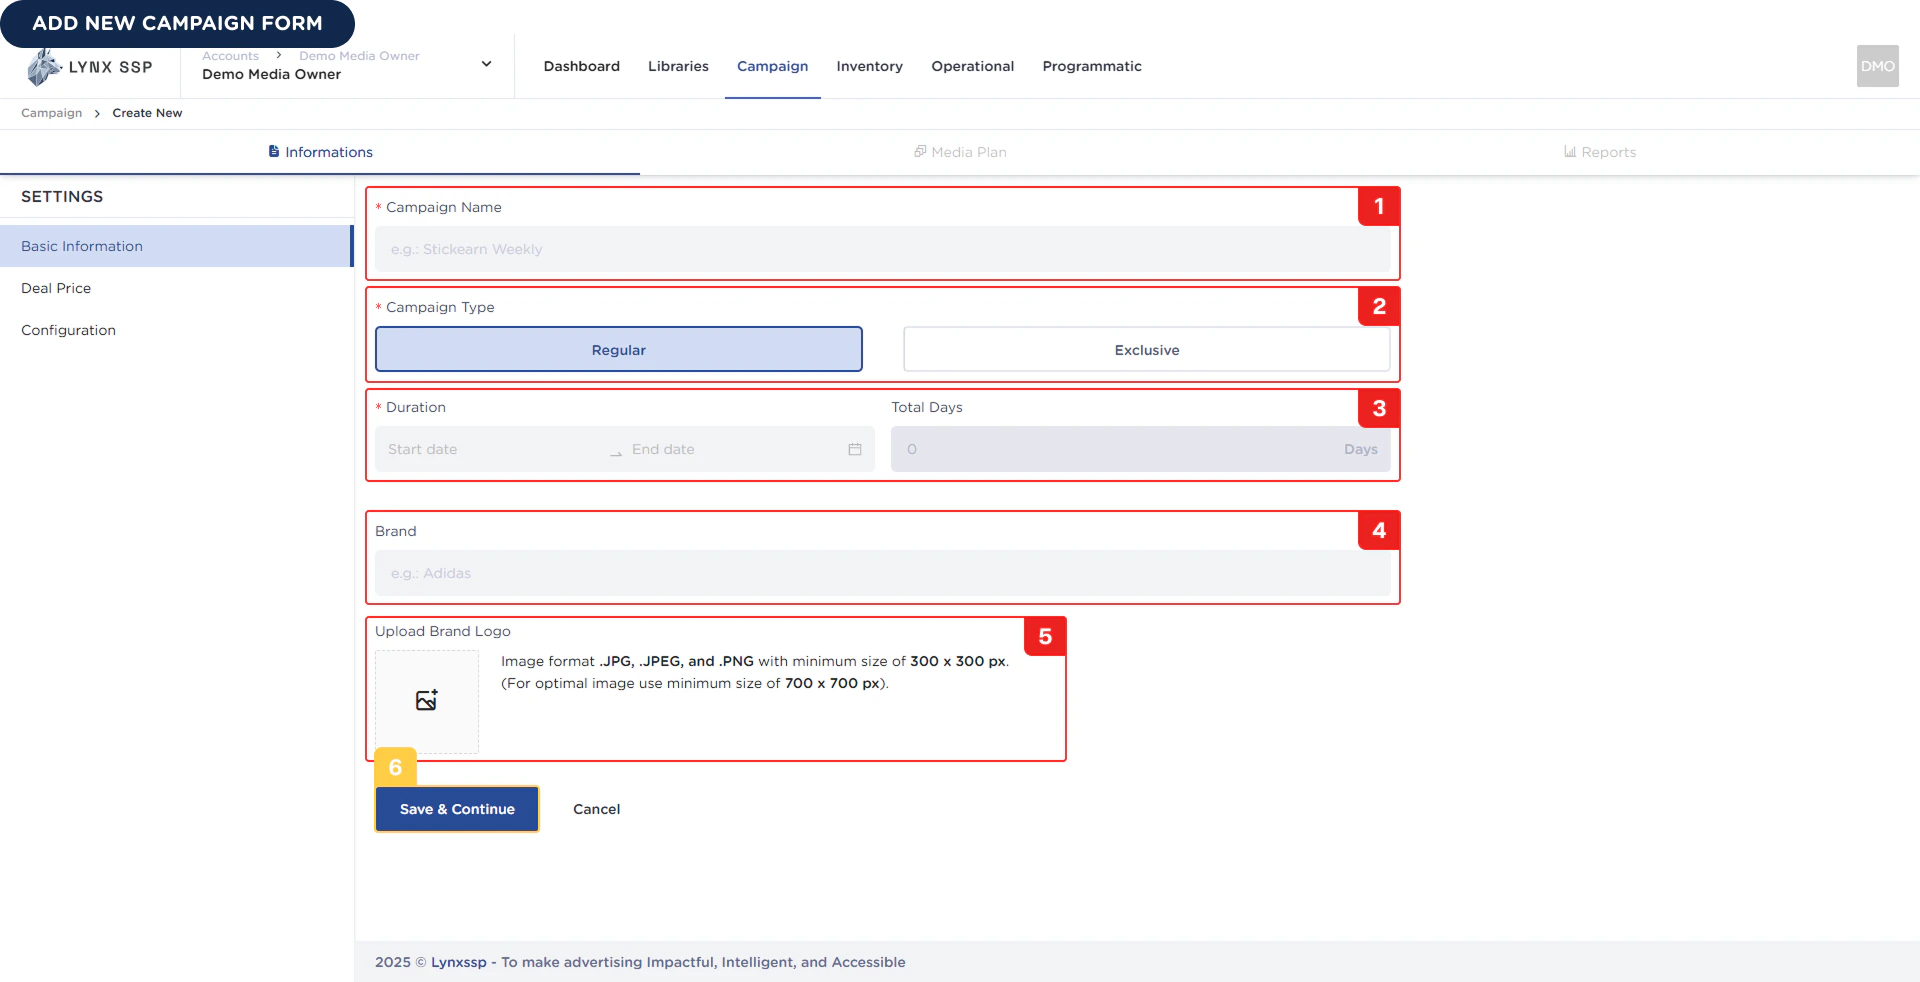 Based on the form above, the information or data required to create a new campaign is as follows:
You can enter the name of the campaign you created or manage.
The campaign name you use cannot be duplicated. When you enter a campaign name that has been used previously and still exists in the system, the system will issue a warning that the campaign name cannot be used.
You must choose one of the two types available for a campaign: **Regular** or **Exclusive** ([See Campaign Type ↗](/documentation/campaign-management/campaign/type)).
The selected campaign duration will be used when you filter the Campaign Report page. The date range that will be active as a filter on the campaign report page is the range of the campaign duration ([See Campaign Report ↗](/documentation/campaign-management/reports/overview)).
A campaign has a schedule period specifying when the campaign starts and when it ends. You must select the campaign duration range or schedule. The format used for this schedule is dd/MM/yyyy \~ dd/MM/yyyy.
The it will display the total number of days for the campaign you are about to create.
You can fill in this field with the brand name associated with the campaign you are creating.
You can upload photos from brands related to the campaign you are going to create.
Image formats are: .JPG, .JPEG, and .PNG with a minimum size of 300 x 300 px (optimal size is 700 x 700 px).
To continue and save the campaign data you have filled in, you can click the **Save & Continue** button. Once the campaign has been successfully created, you will be directed to ([See Media Plan ↗](/documentation/campaign-management/create/media-plan/create)) to fill in the details of the Media Plan.
Based on the form above, the information or data required to create a new campaign is as follows:
You can enter the name of the campaign you created or manage.
The campaign name you use cannot be duplicated. When you enter a campaign name that has been used previously and still exists in the system, the system will issue a warning that the campaign name cannot be used.
You must choose one of the two types available for a campaign: **Regular** or **Exclusive** ([See Campaign Type ↗](/documentation/campaign-management/campaign/type)).
The selected campaign duration will be used when you filter the Campaign Report page. The date range that will be active as a filter on the campaign report page is the range of the campaign duration ([See Campaign Report ↗](/documentation/campaign-management/reports/overview)).
A campaign has a schedule period specifying when the campaign starts and when it ends. You must select the campaign duration range or schedule. The format used for this schedule is dd/MM/yyyy \~ dd/MM/yyyy.
The it will display the total number of days for the campaign you are about to create.
You can fill in this field with the brand name associated with the campaign you are creating.
You can upload photos from brands related to the campaign you are going to create.
Image formats are: .JPG, .JPEG, and .PNG with a minimum size of 300 x 300 px (optimal size is 700 x 700 px).
To continue and save the campaign data you have filled in, you can click the **Save & Continue** button. Once the campaign has been successfully created, you will be directed to ([See Media Plan ↗](/documentation/campaign-management/create/media-plan/create)) to fill in the details of the Media Plan.