> ## Documentation Index
> Fetch the complete documentation index at: https://docs.lynxssp.com/llms.txt
> Use this file to discover all available pages before exploring further.

# Windows

Screen App is an application used to organize & display creative content that will be played on a Digital Billboard at a predetermined time and location through Lynx SSP. Screen App becomes a bridge between Lynx SSP (where you set up campaigns, billboards, etc.) and Media Player.

## How to Install ScreenApp on Windows?

## Minimum Requirement

| **OS**        |  :  | **Windows 10 (64-bit)**                      |
| :------------ | :-: | :------------------------------------------- |
| **Processor** |  :  | **Intel(R) Core(TM) i5-2520M CPU @ 2.50GHz** |
| **RAM**       |  :  | **8.00 GB (7.63 GB Usable)**                 |
| **SSD**       |  :  | **250 GB**                                   |

## Download ScreenApp

Download the Screen App installer at the following link:

<Card title="Screen App Windows Download" icon="download" href="https://drive.google.com/file/d/1drbk5_reJqycu6-NMtm3NoRDtqEvFcuE/view?usp=drive_link" horizontal />

## Install ScreenApp on Windows

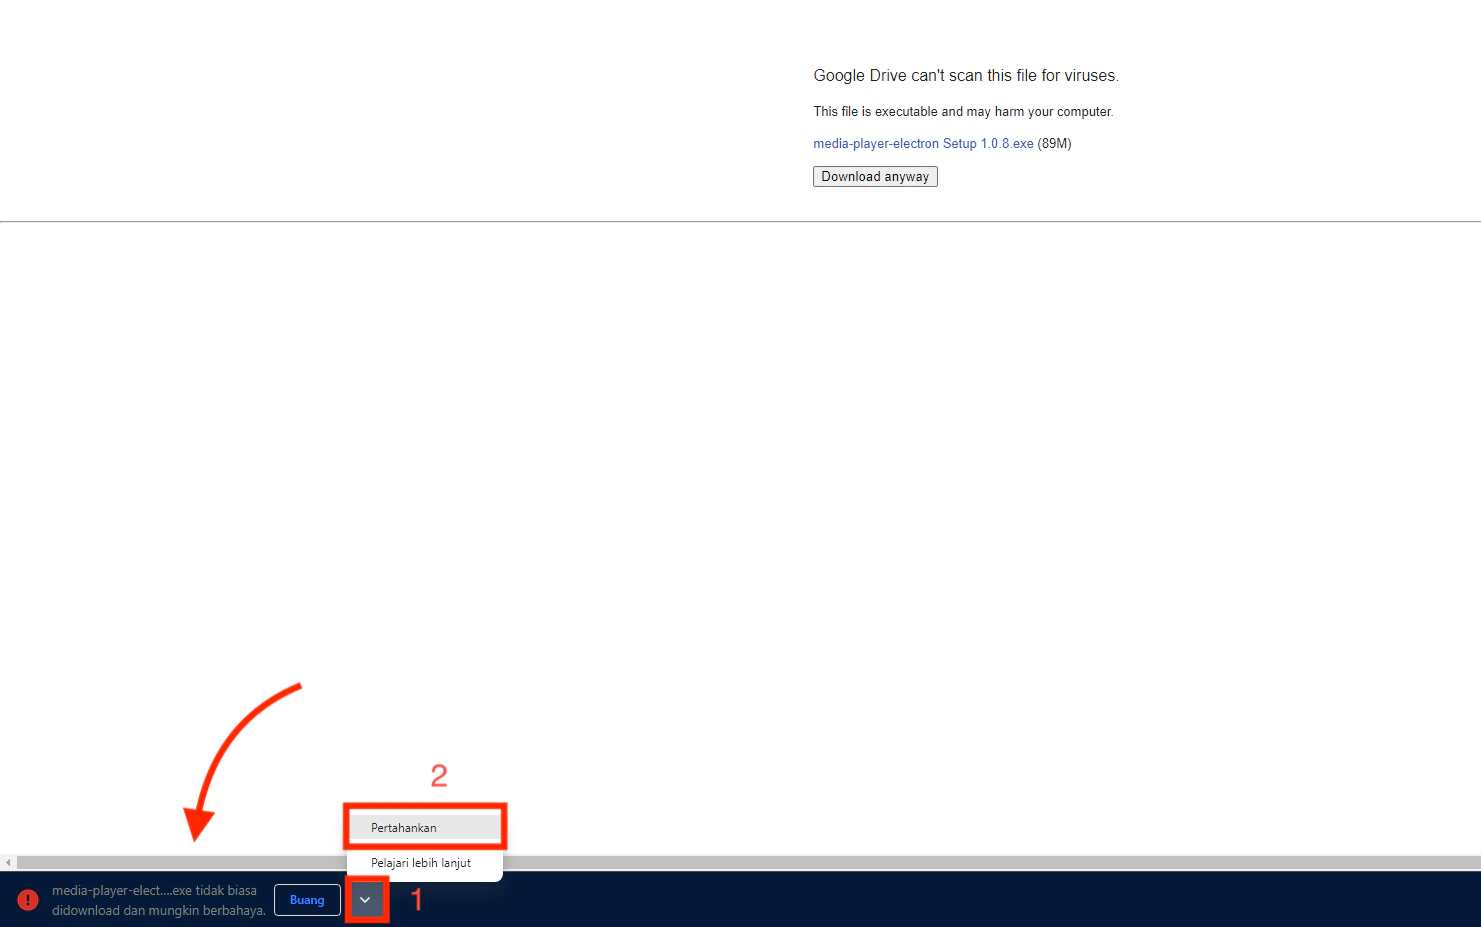
After going to link download, if you find the display as shown below, click the Dropdown button. Then click Keep so that the Installer can still be downloaded.

<img src="https://mintcdn.com/lynxssp-91a2d3cb/bjZDAGET5iPaYwlI/images/imagae2.png?fit=max&auto=format&n=bjZDAGET5iPaYwlI&q=85&s=5d7d22705eeb61060eb1d37387bf5855" alt="Imagae2 Pn" width="1481" height="927" data-path="images/imagae2.png" />

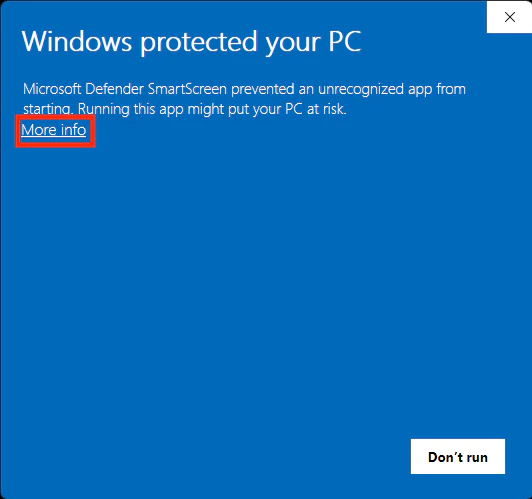
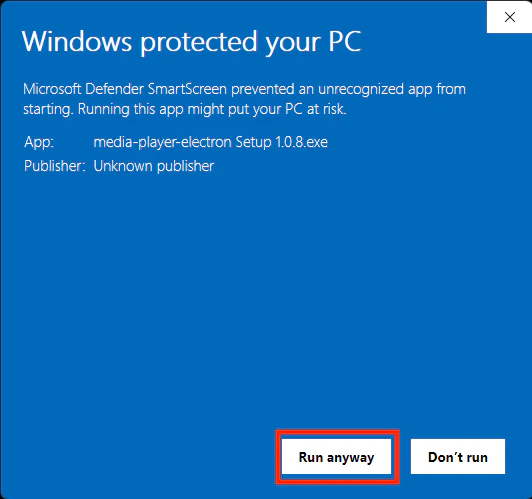
After the installation has successfully downloaded, run the installer. If you see something like the image below, click “**More Info**” and click the “**Run Anyway”** button afterwards.
<img src="https://mintcdn.com/lynxssp-91a2d3cb/bjZDAGET5iPaYwlI/images/image1.png?fit=max&auto=format&n=bjZDAGET5iPaYwlI&q=85&s=f5deeb6e227da8af55f24d6c4c85136f" alt="Image1 Pn" title="Image1 Pn" className="mx-auto" style={{ width:"54%" }} width="532" height="499" data-path="images/image1.png" />

<p> ‎ ‎ ‎ ‎ ‎ ‎ ‎ ‎ ‎ ‎ ‎ ‎ ‎ ‎ ‎ ‎ ‎ ‎ ‎ ‎ ‎ ‎ ‎</p>

<img src="https://mintcdn.com/lynxssp-91a2d3cb/bjZDAGET5iPaYwlI/images/imagaae4.png?fit=max&auto=format&n=bjZDAGET5iPaYwlI&q=85&s=141dfbf82f18e82be6bc3fd7ef5d22ce" alt="Imagaae4 Pn" title="Imagaae4 Pn" className="mx-auto" style={{ width:"54%" }} width="532" height="499" data-path="images/imagaae4.png" />

The Screen App can already be used.

## Setting Sync Windows Time

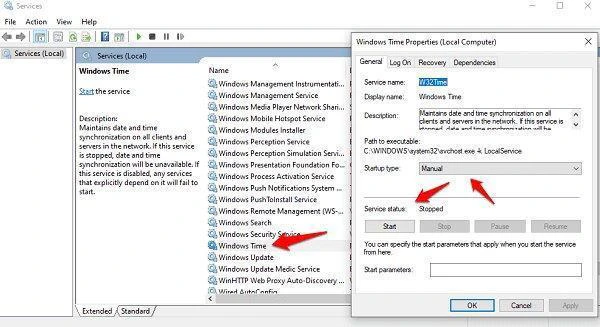
It should be noted every time the device is turned on, specifically the comparison of the device clock with the real clock. because it is feared that there will be an issue if there is a difference between the installation clock and real-time.
<Steps>
  <Step title="Click win + r, then type services.msc" />

  <Step title="Search for services windows time" />

  <Step title="Right click and select properties" />

  <Step title="Select startup type and change to automatic delayed start" />
</Steps>

<img src="https://mintcdn.com/lynxssp-91a2d3cb/bjZDAGET5iPaYwlI/images/imagsse3.png?fit=max&auto=format&n=bjZDAGET5iPaYwlI&q=85&s=915adb1a7323ea83e768c1472935badf" alt="Imagsse3 Pn" title="Imagsse3 Pn" className="mx-auto" style={{ width:"77%" }} width="600" height="327" data-path="images/imagsse3.png" />
