

Accessing the Add New Campaign Page
1
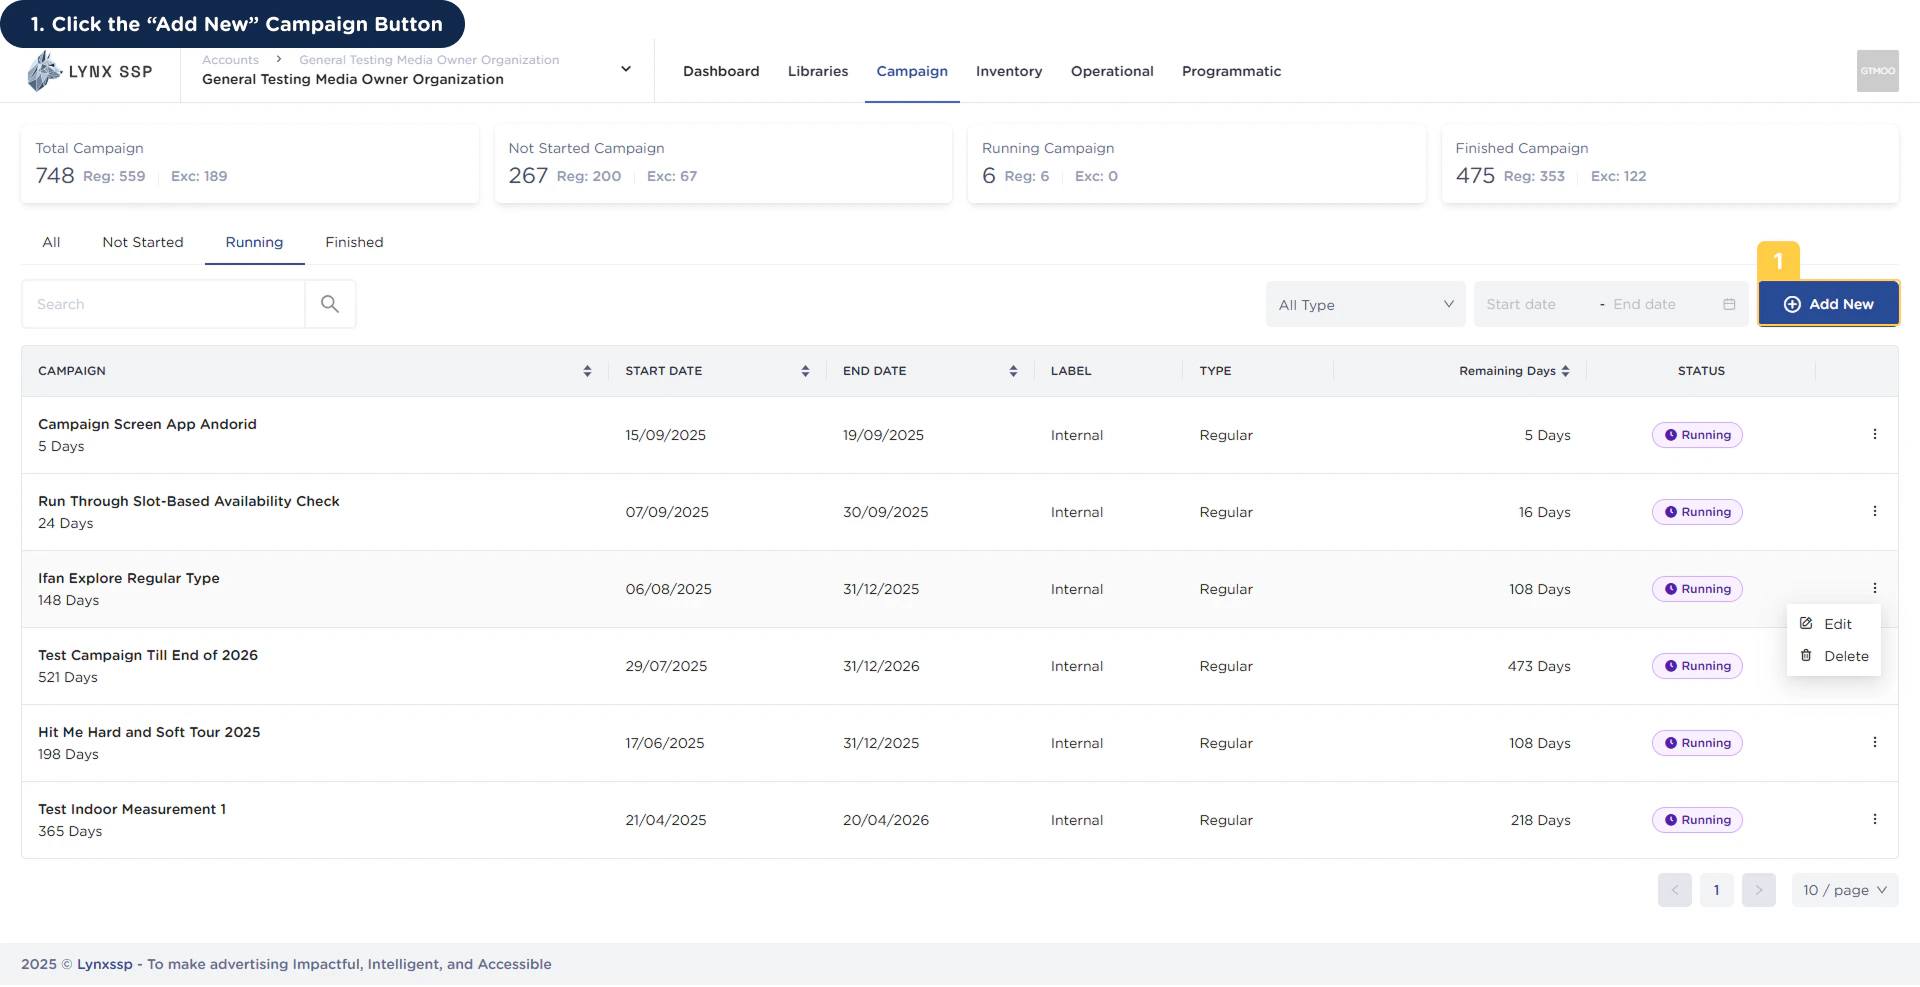
Click 'Add New' Campaign Button
![Fire Shot Capture219 Campaign Detail Old Client Portal [dashboard Lynxssp Com] Pn](https://mintcdn.com/lynxssp-91a2d3cb/jVFvCf5Nw6YzXEx5/images/FireShotCapture219-CampaignDetailOld-ClientPortal-%5Bdashboard.lynxssp.com%5D.png?fit=max&auto=format&n=jVFvCf5Nw6YzXEx5&q=85&s=974637ca7f066258a95b3466879420b3)
Add New Campaign Form
When creating a campaign on the Lynx SSP Platform, you’ll need to prepare and enter several pieces of information or data into the following form: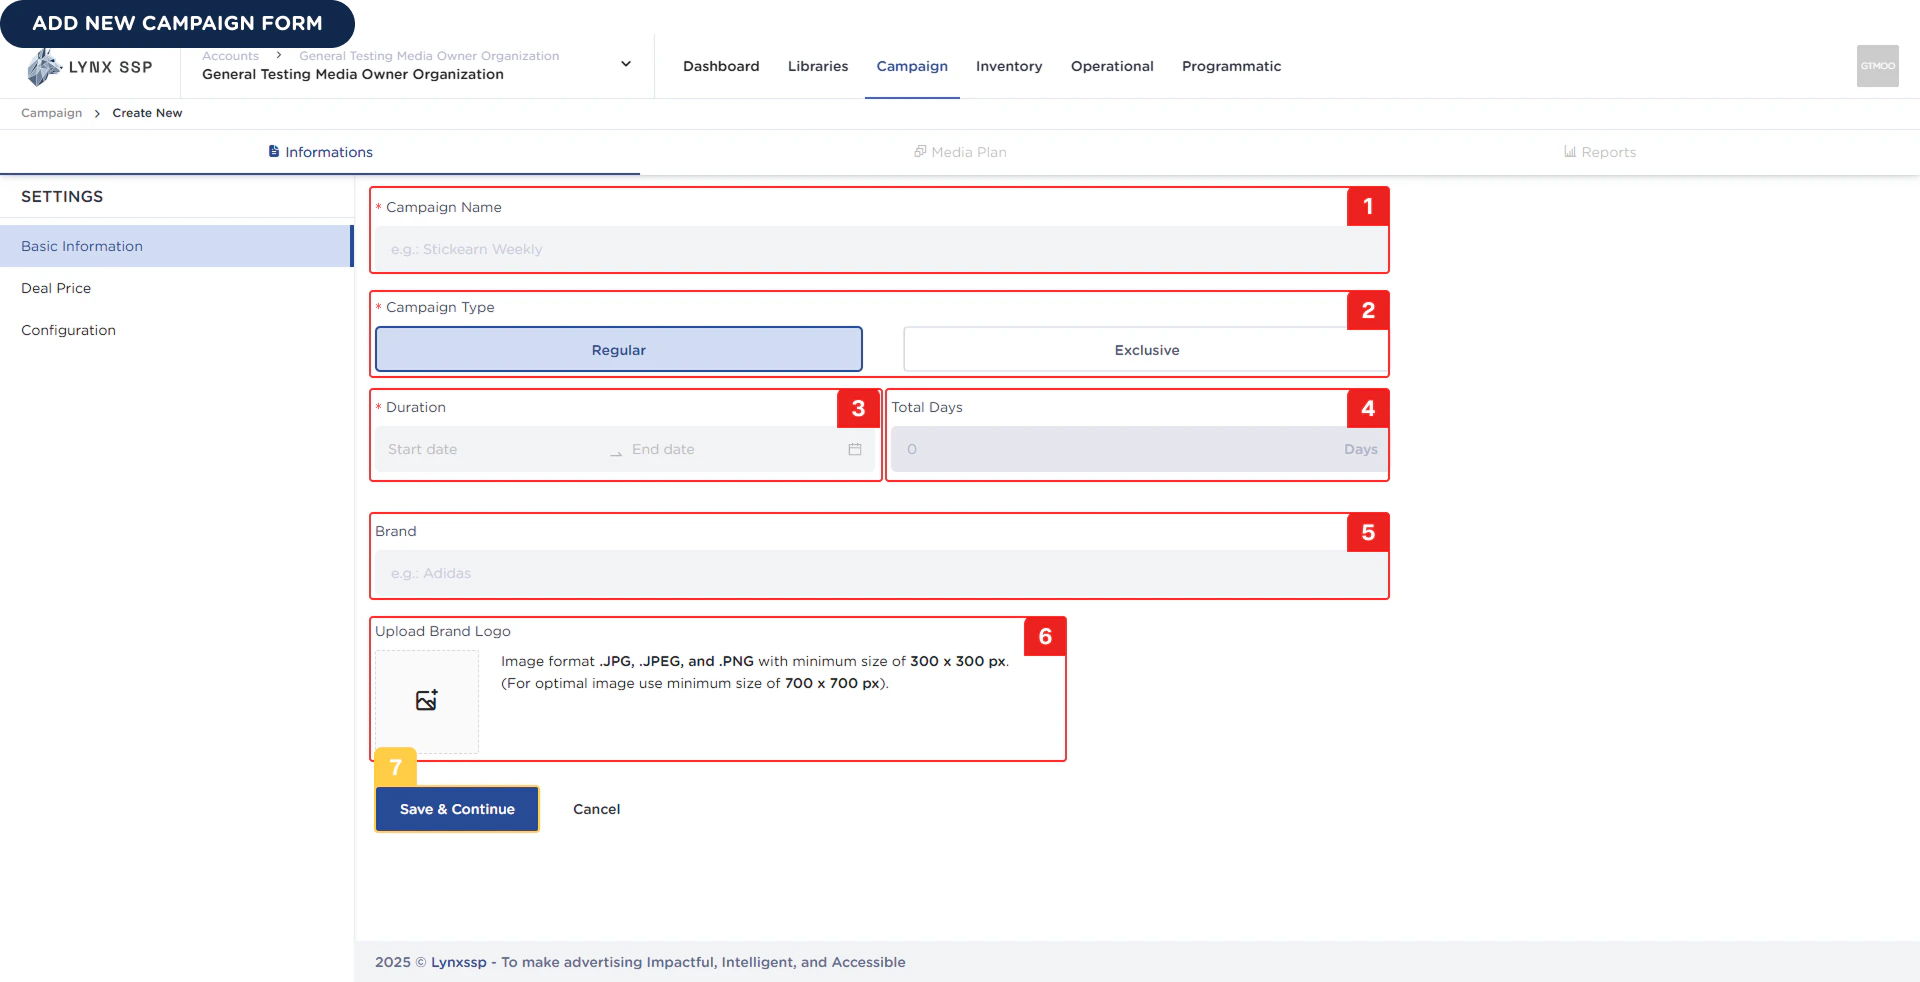
1
Campaign Name (Required)
You can enter the Campaign Name that you are creating or managing.Example: You will create and manage a campaign named “New Product Snack ABC” to promote the latest product from Snack ABC.
The campaign name you use cannot be a duplicate. When you enter a campaign name that has been used before and is still in the system, the system will issue a warning that the campaign name cannot be used.
2
Campaign Type (Required)
You must choose one of the two types a campaign can have: Regular or Exclusive (See Campaign Type).
3
Duration (Required)
A campaign has a scheduled period for when it starts and when it ends. You must select the duration range or schedule for the campaign. The format used for this schedule is dd/MM/yyyy ~ dd/MM/yyyy.Example: The duration for New Product Snack ABC is from October 01, 2025 - October 31, 2025.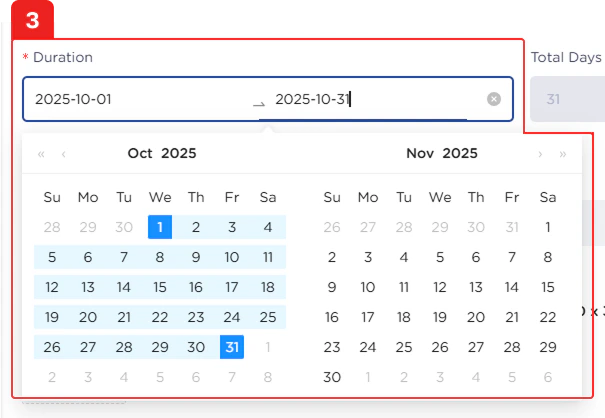
4
Total Days
This shows the total number of days your campaign will run.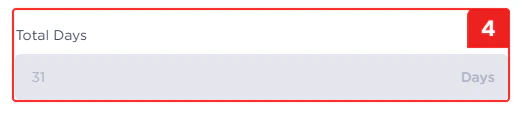
5
Brand Name (Optional)
You can fill in this column with the brand name associated with the campaign you are creating.Example: Enter the brand name for the New Product Snack ABC campaign, which is Snack ABC.
6
Brand Image (Optional)
You can upload a photo of the brand associated with the campaign you are creating.
The image format should be .JPG, .JPEG, and .PNG with a minimum size of 300 x 300 px (the optimal size is 700 x 700 px).
7
Click 'Save & Continue'
To continue and save the campaign data you’ve entered, you can click the “Save & Continue” button. Once the campaign is successfully created, you will be directed to (See Creating a Media Plan ↗) to fill in the details for the Media Plan.