Accessing Inventory Display
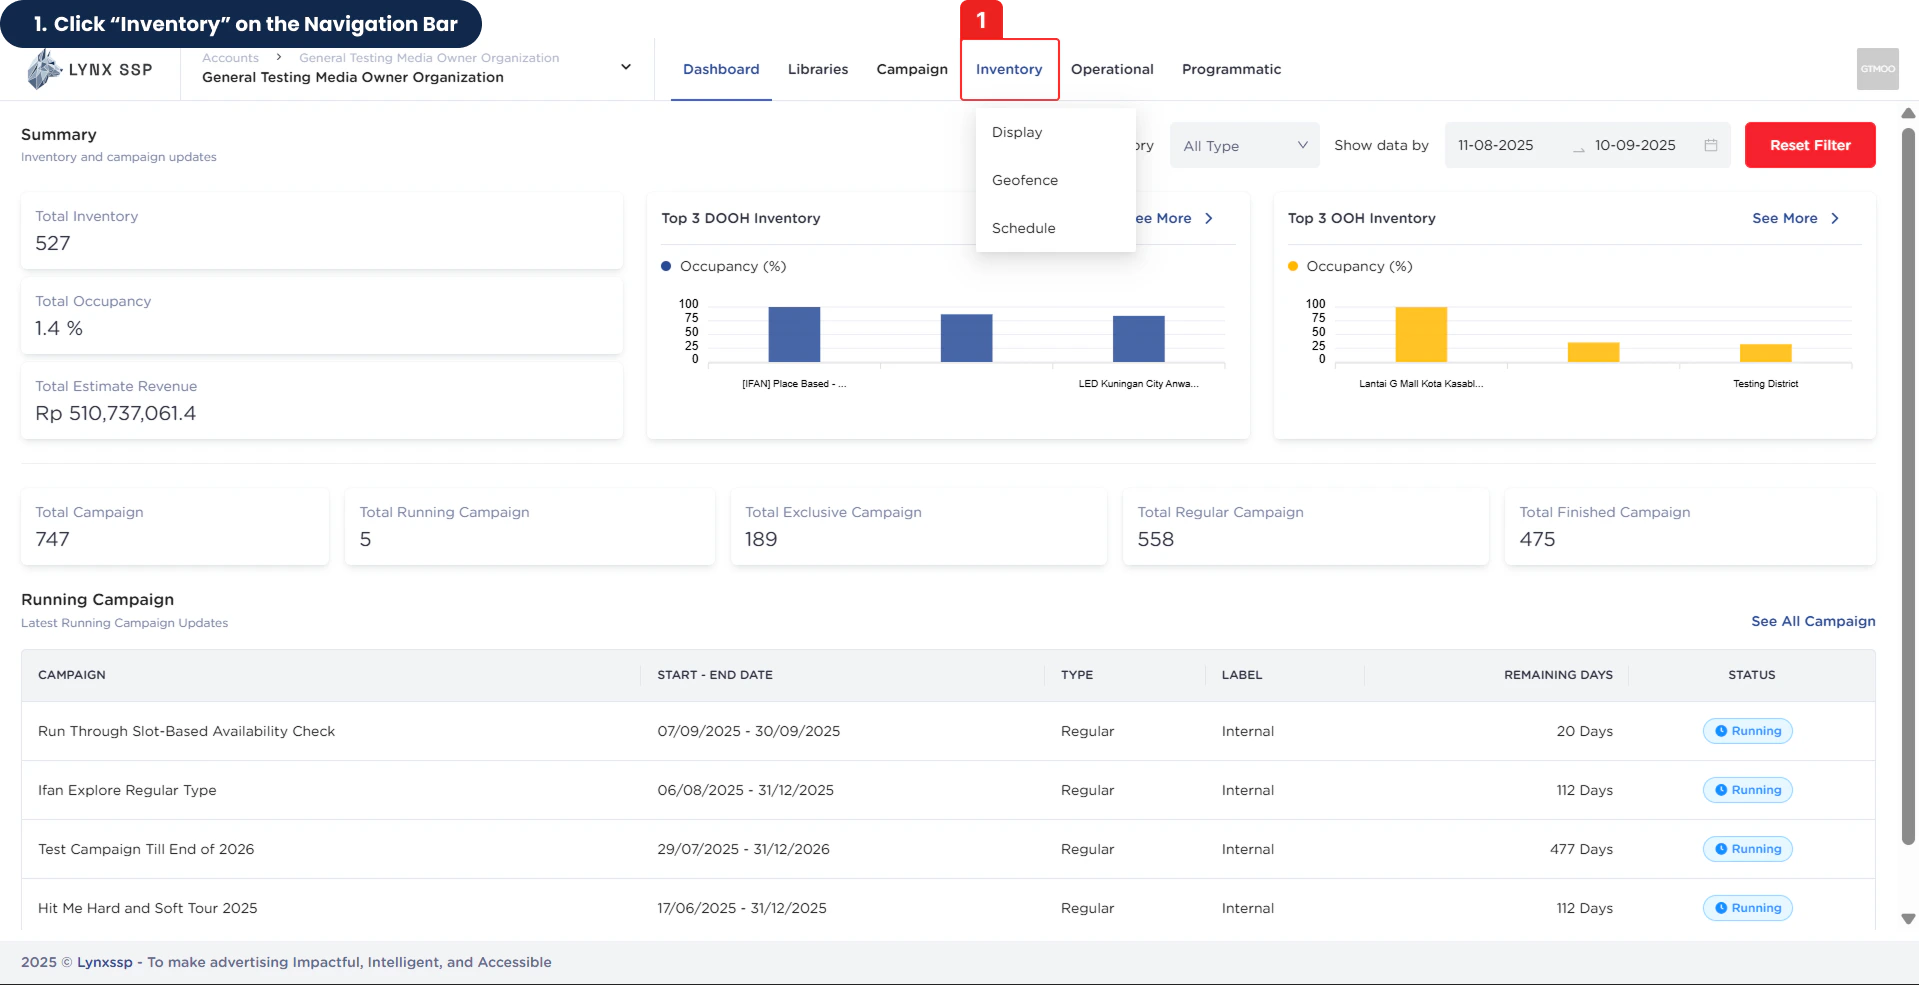
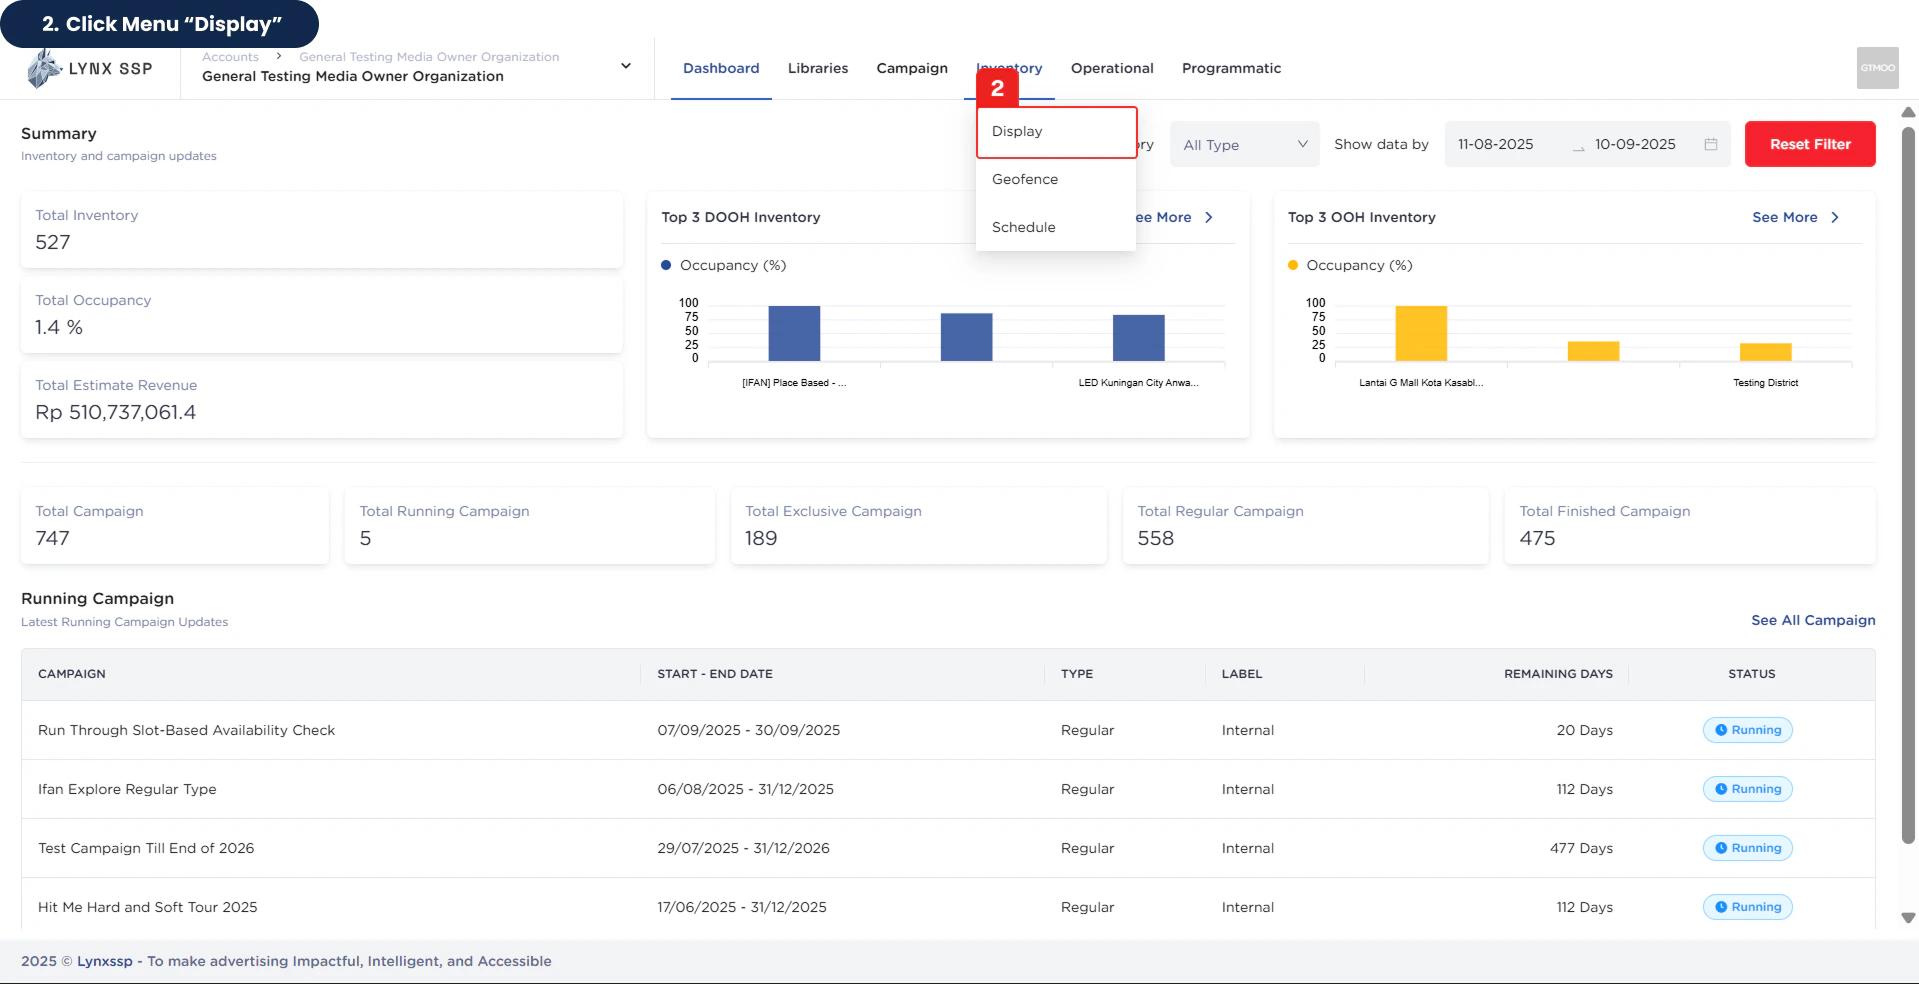
Inventory Display Overview
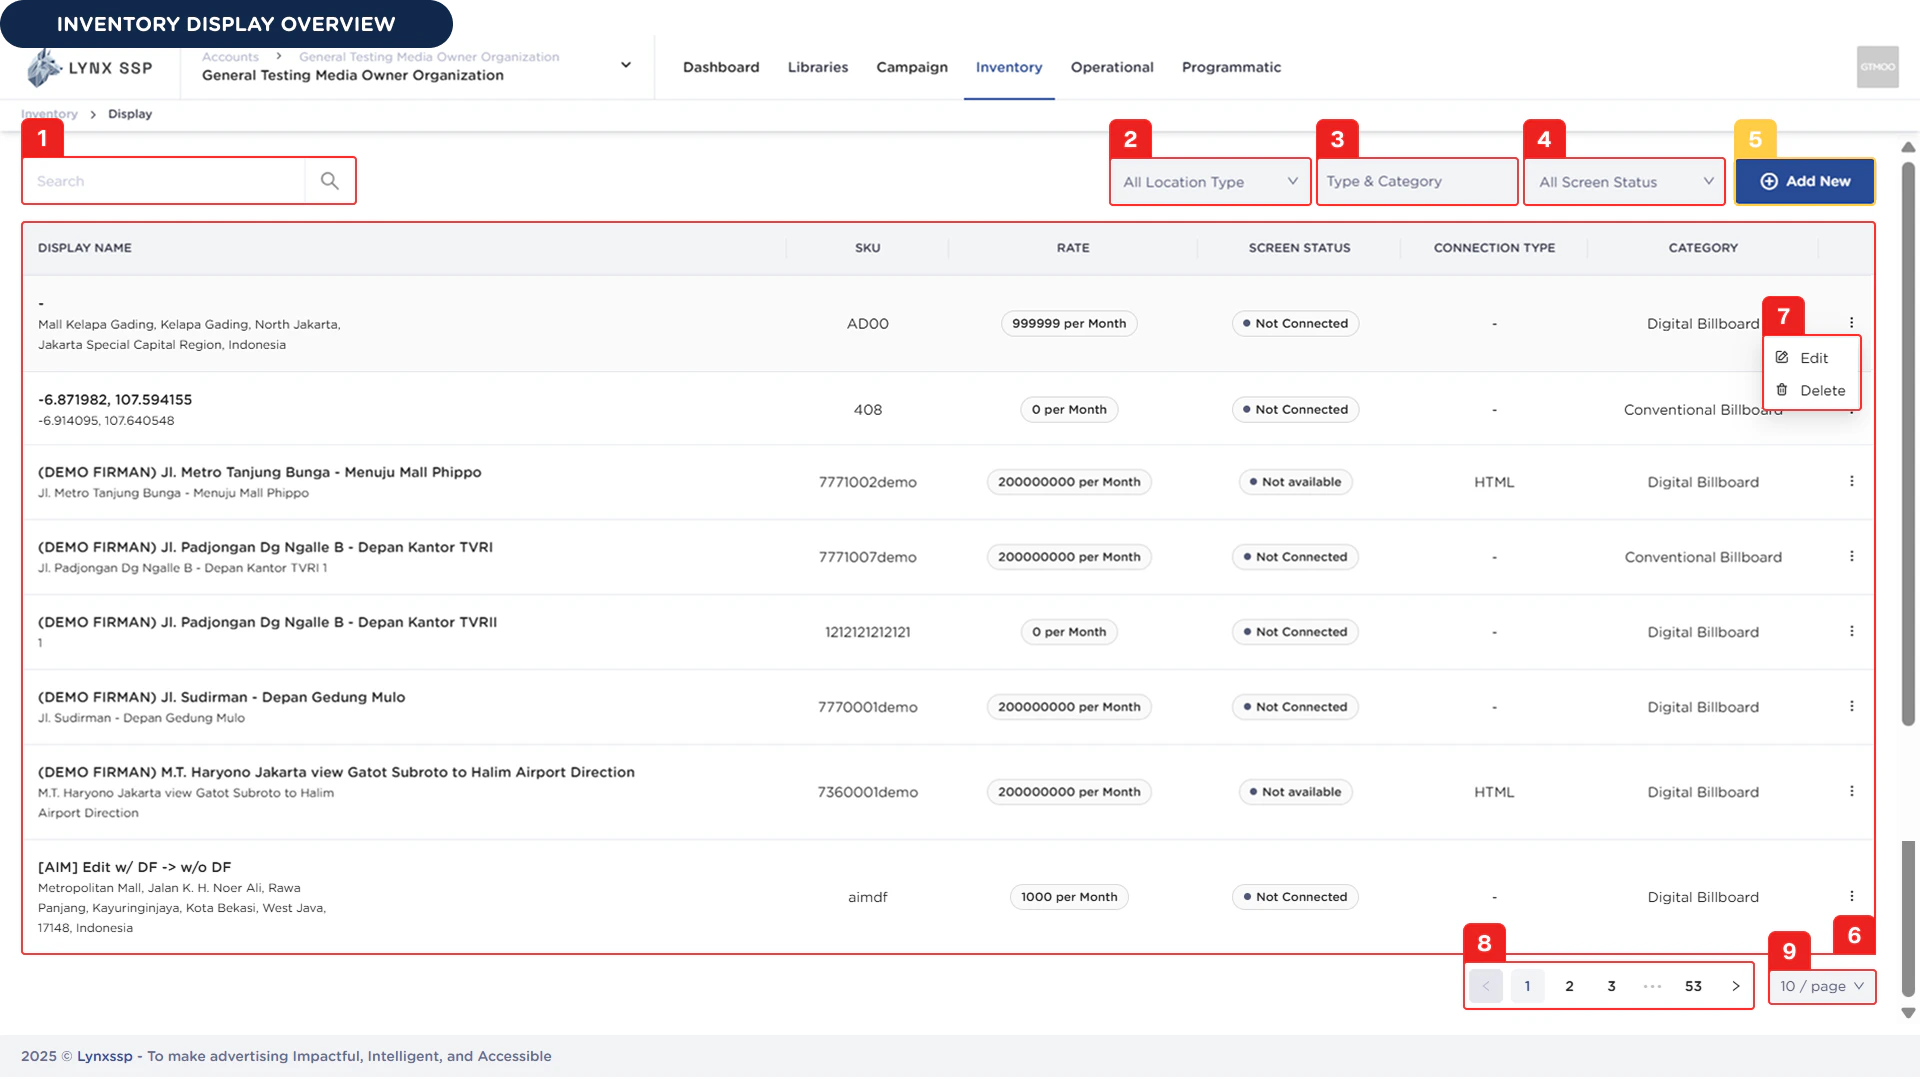
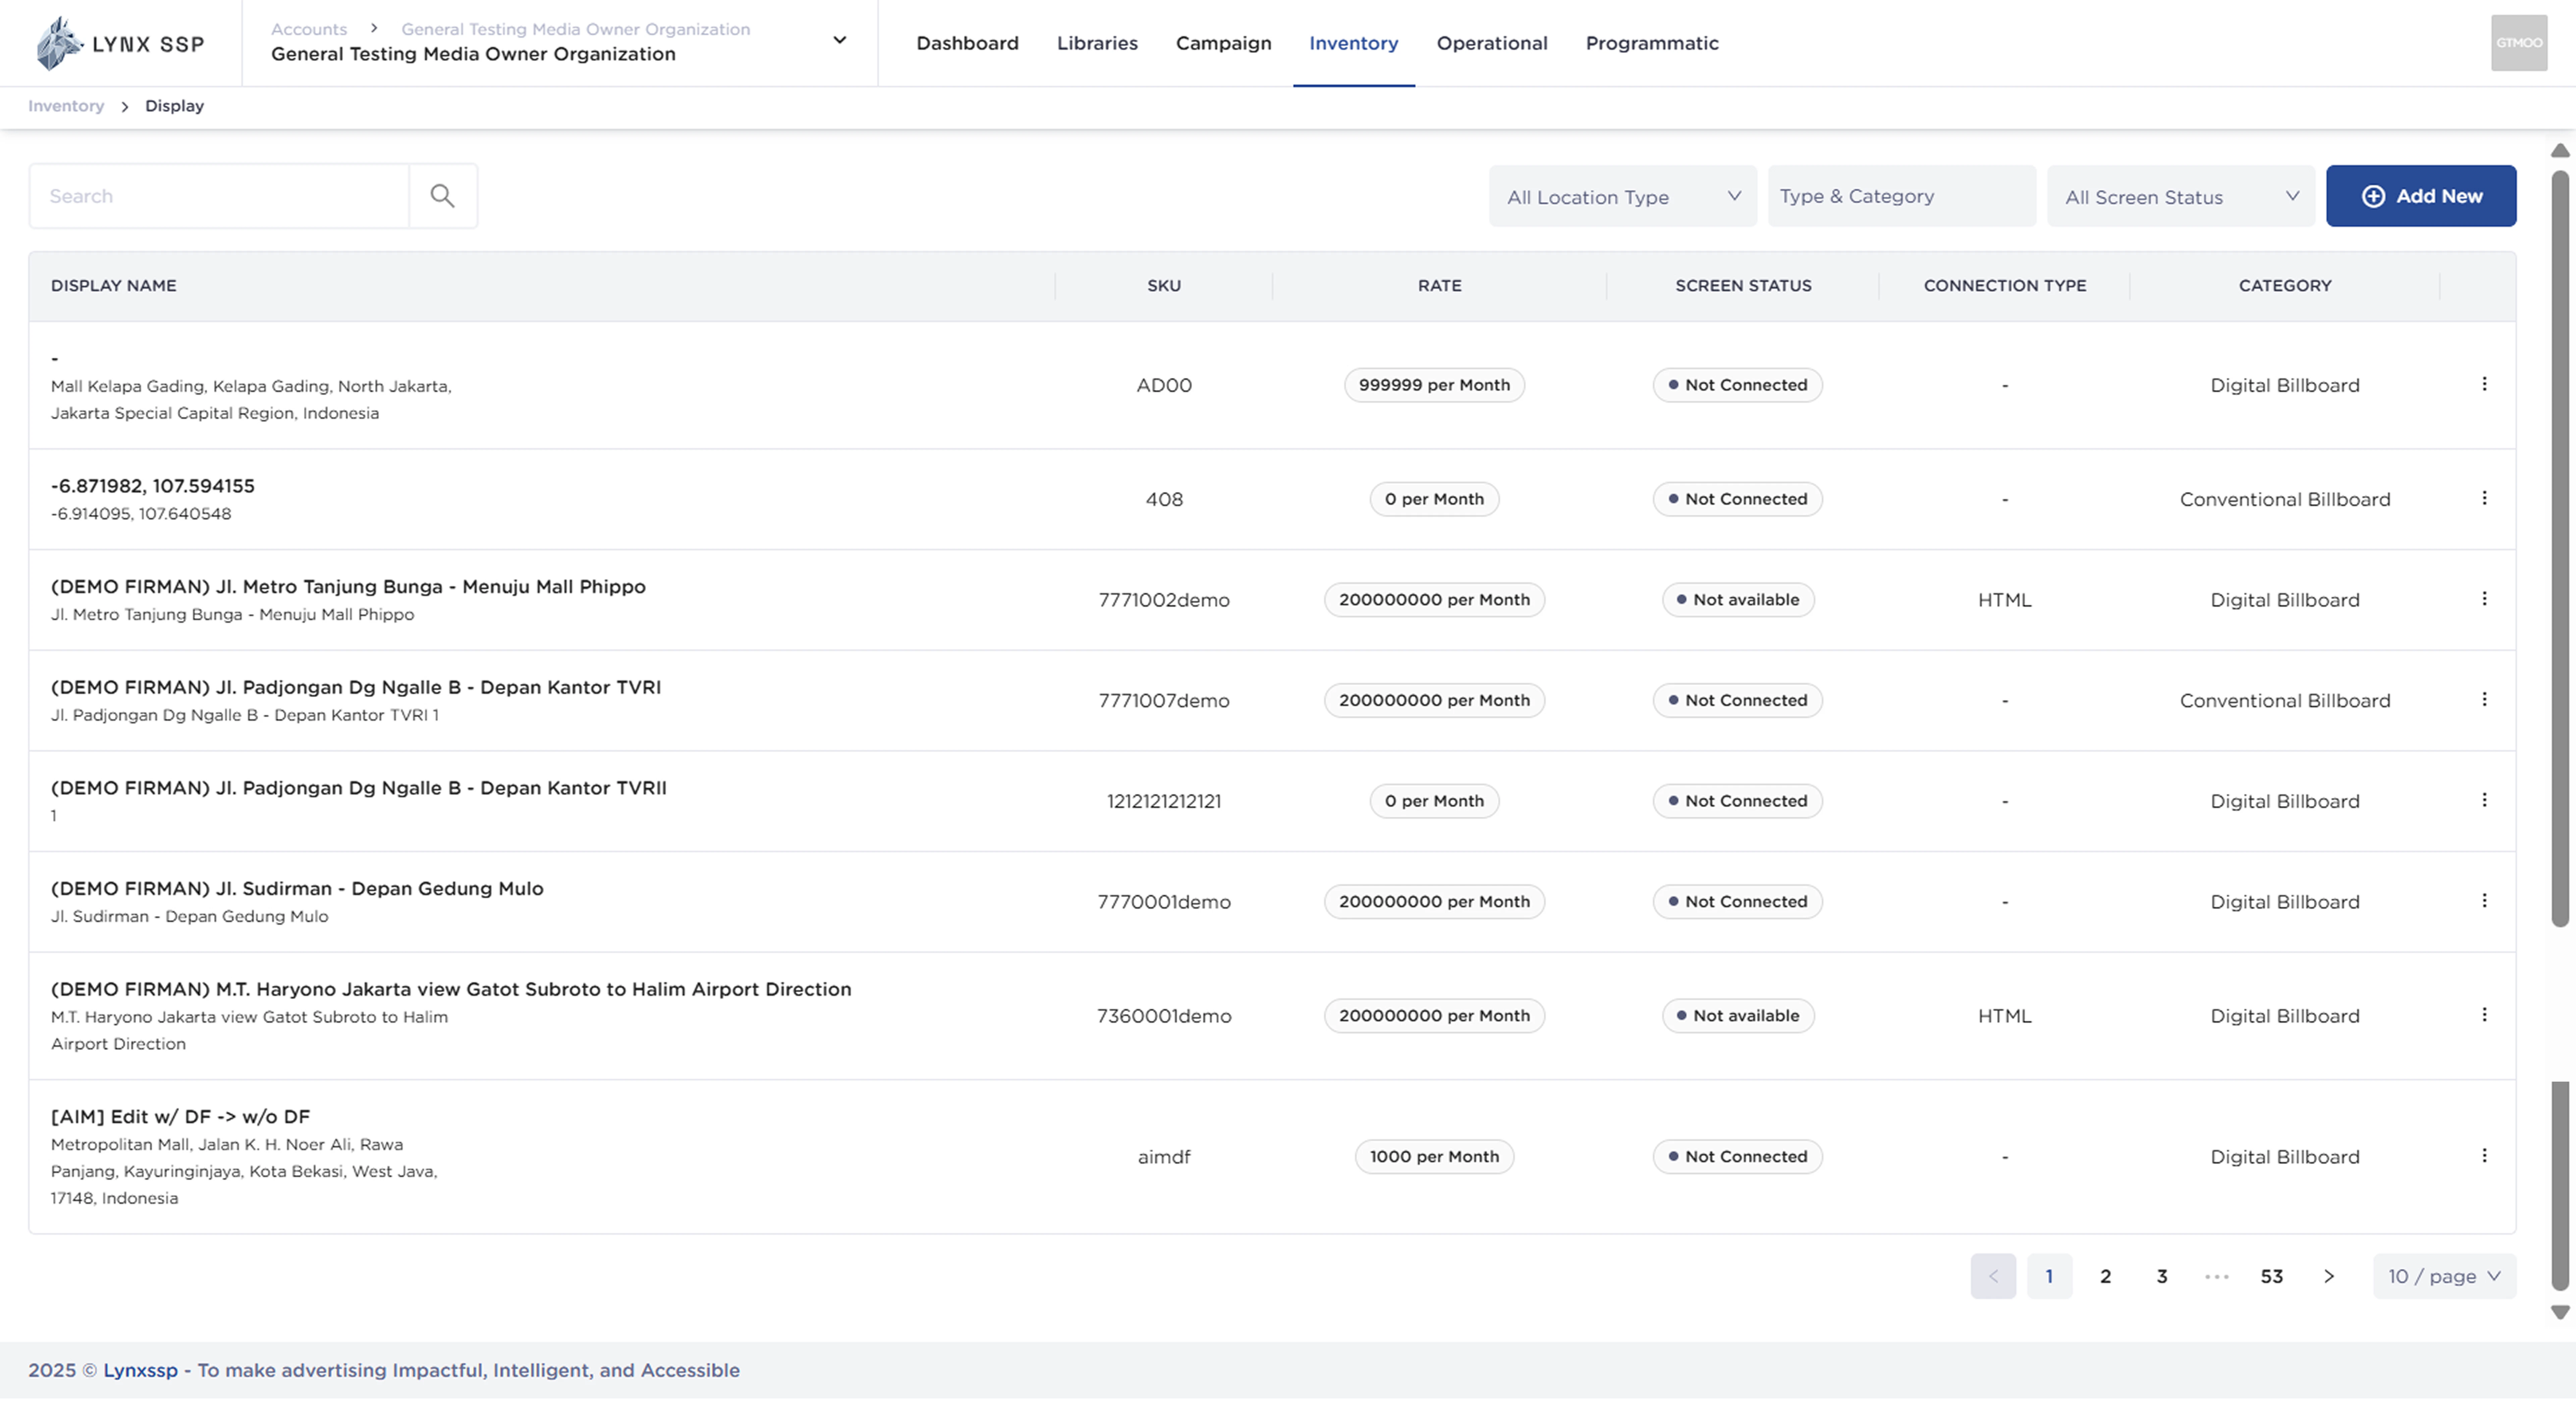
Inventory Search
You can search for inventory by typing keywords based on the Inventory Name or SKU Number that you specified when creating it.Filter by Location Type
You can filter the inventory display data in the inventory list based on the location type. There are two location types you can choose from: Indoor and Outdoor.Filter by Type & Category
You can filter the inventory display data in the inventory list based on the type of inventory category you have, namely DOOH (Digital-Out-of-Home) & OOH (Out-of-Home) (See Specification, Type & Category ↗).Filter by Screen Status
You can filter the inventory display data in the inventory list based on the status of the screen that is connected to a display (See Screen Status ↗).Add New Inventory Button
To create or register your inventory in the system, you can press the “Add New” button on this page, and the system will immediately take you to a new page where you must fill in the data regarding the specifications of the inventory.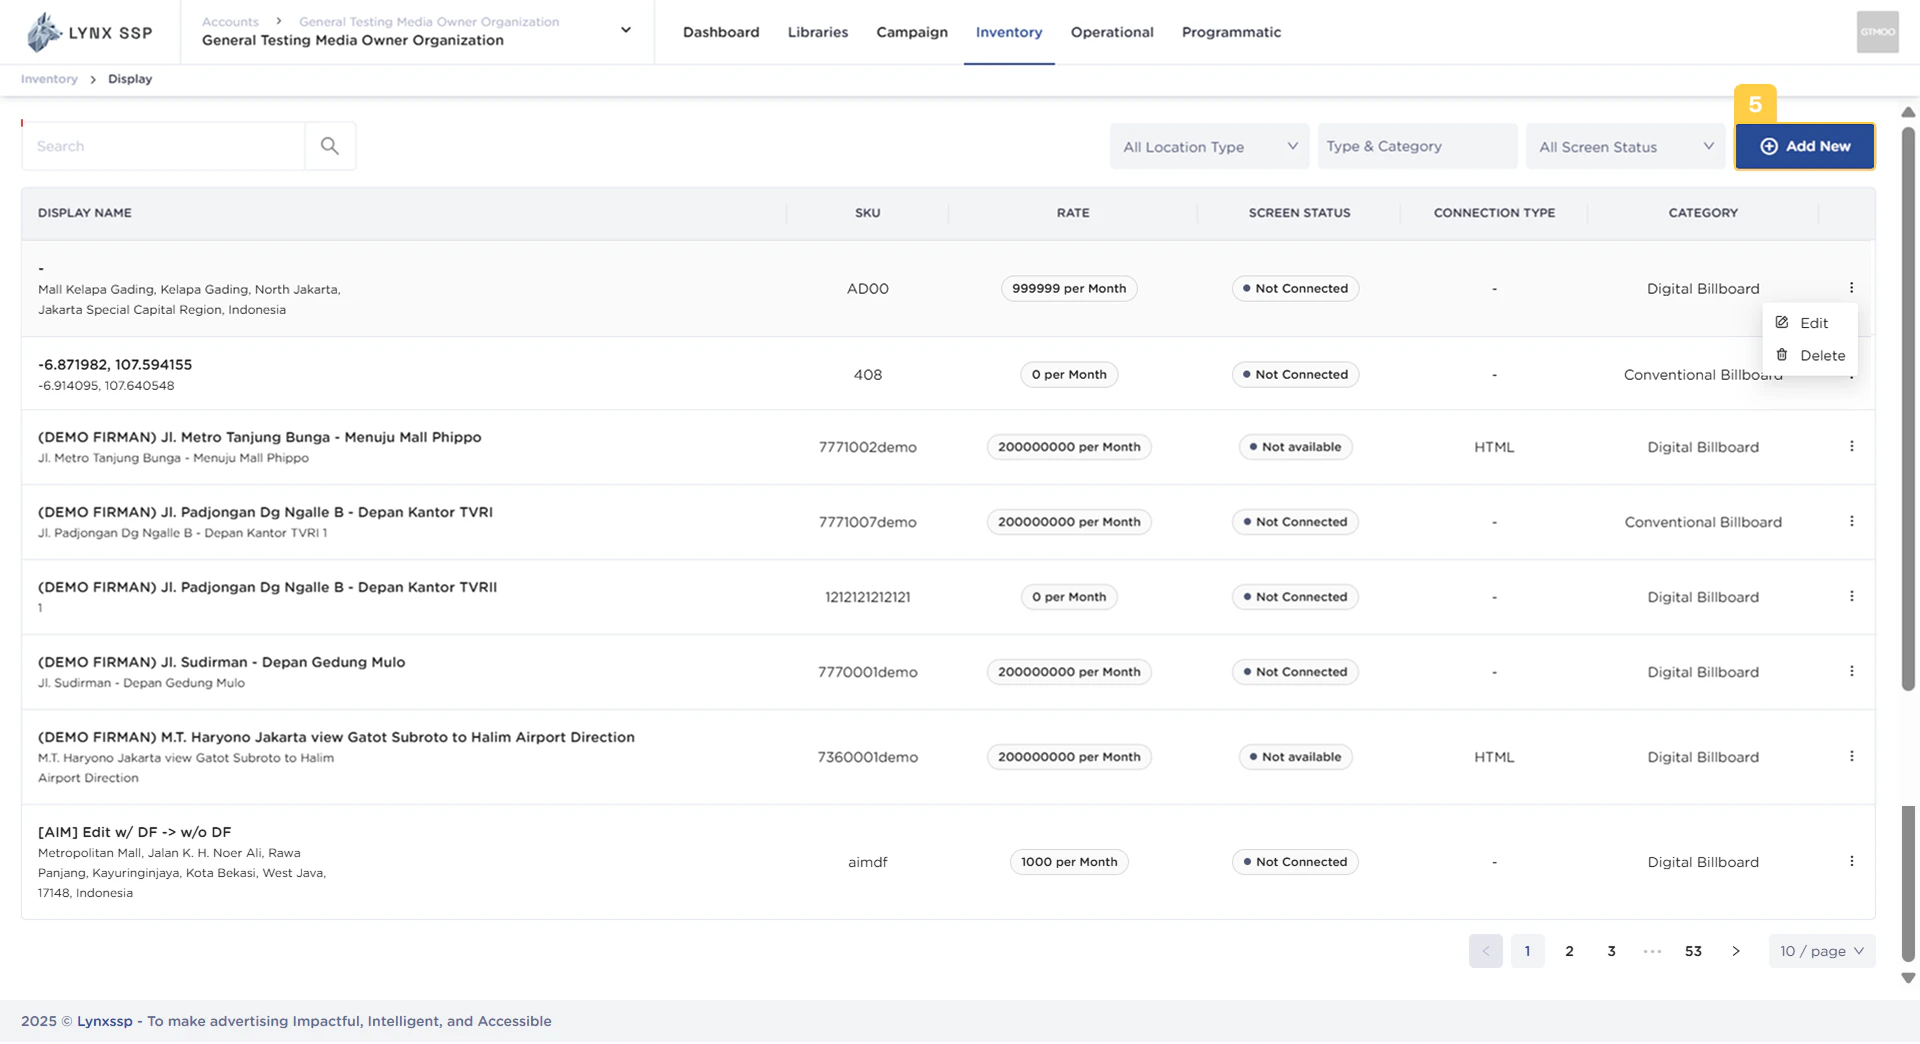
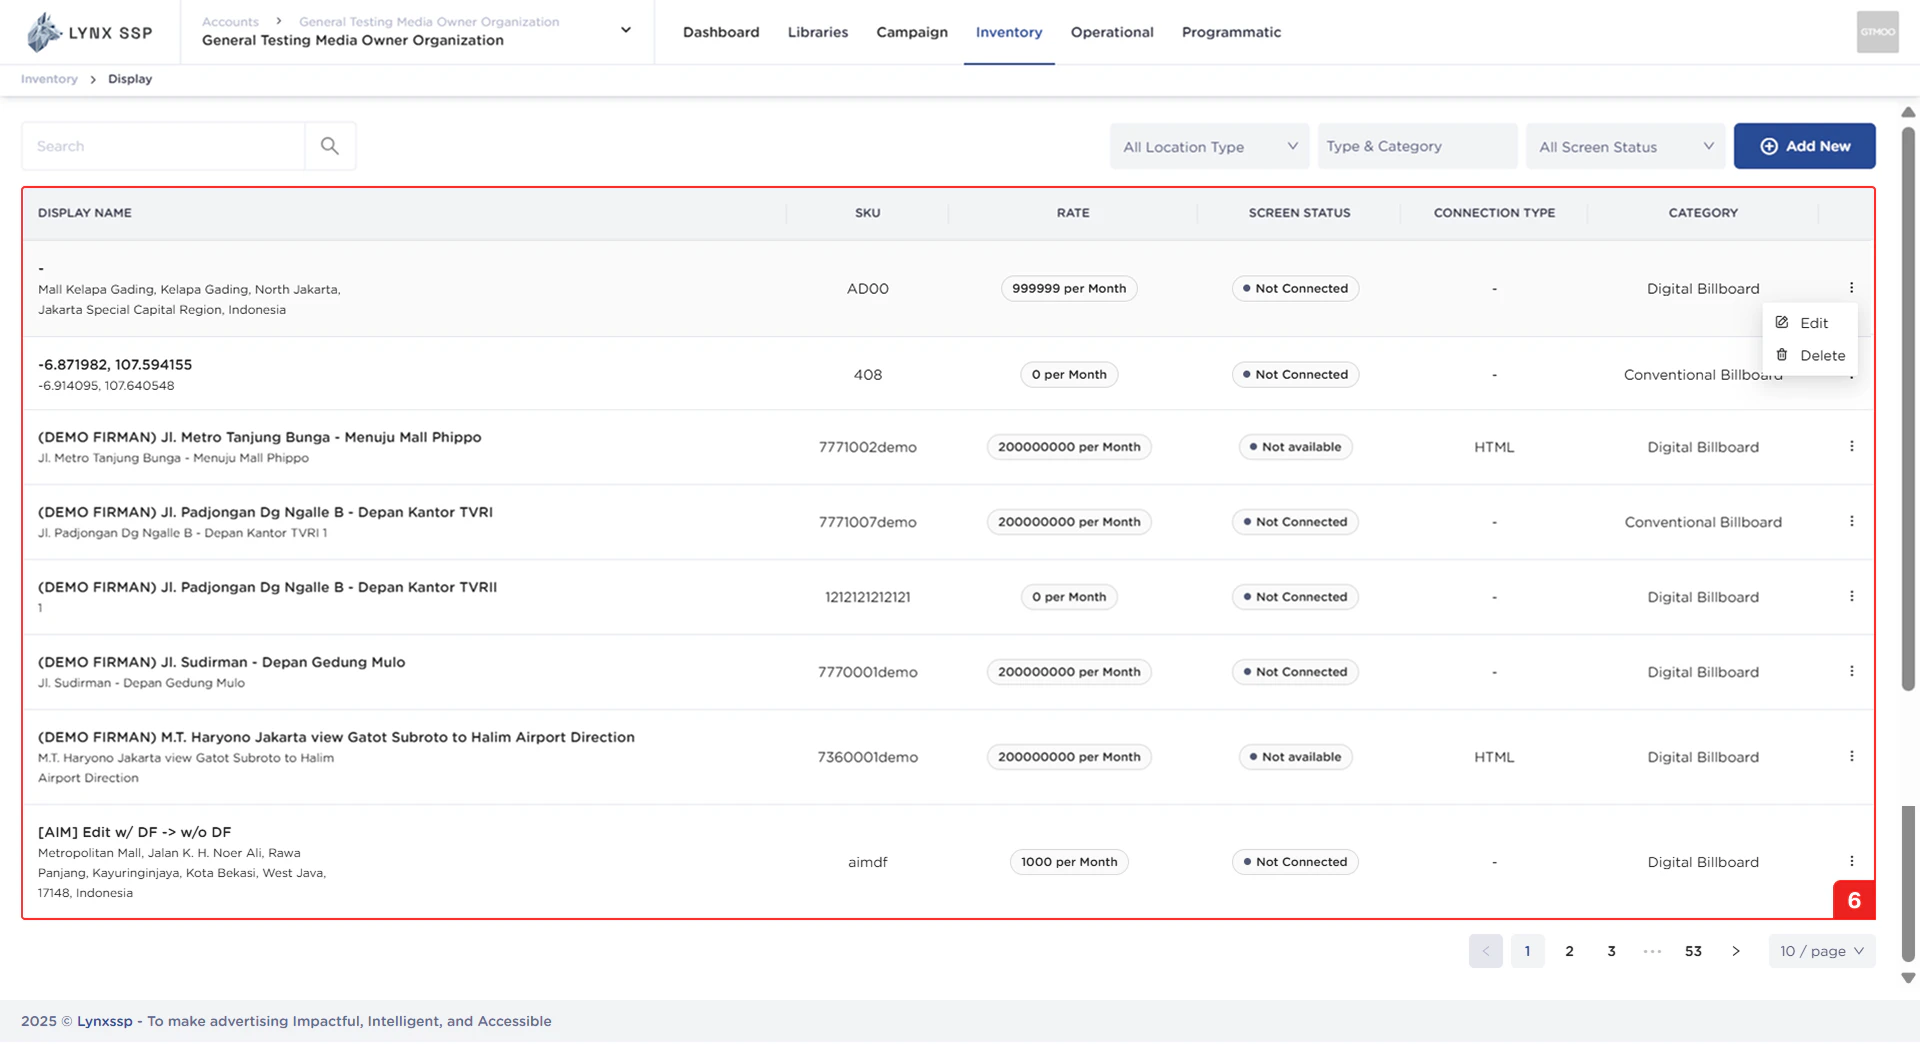
List Inventory Display
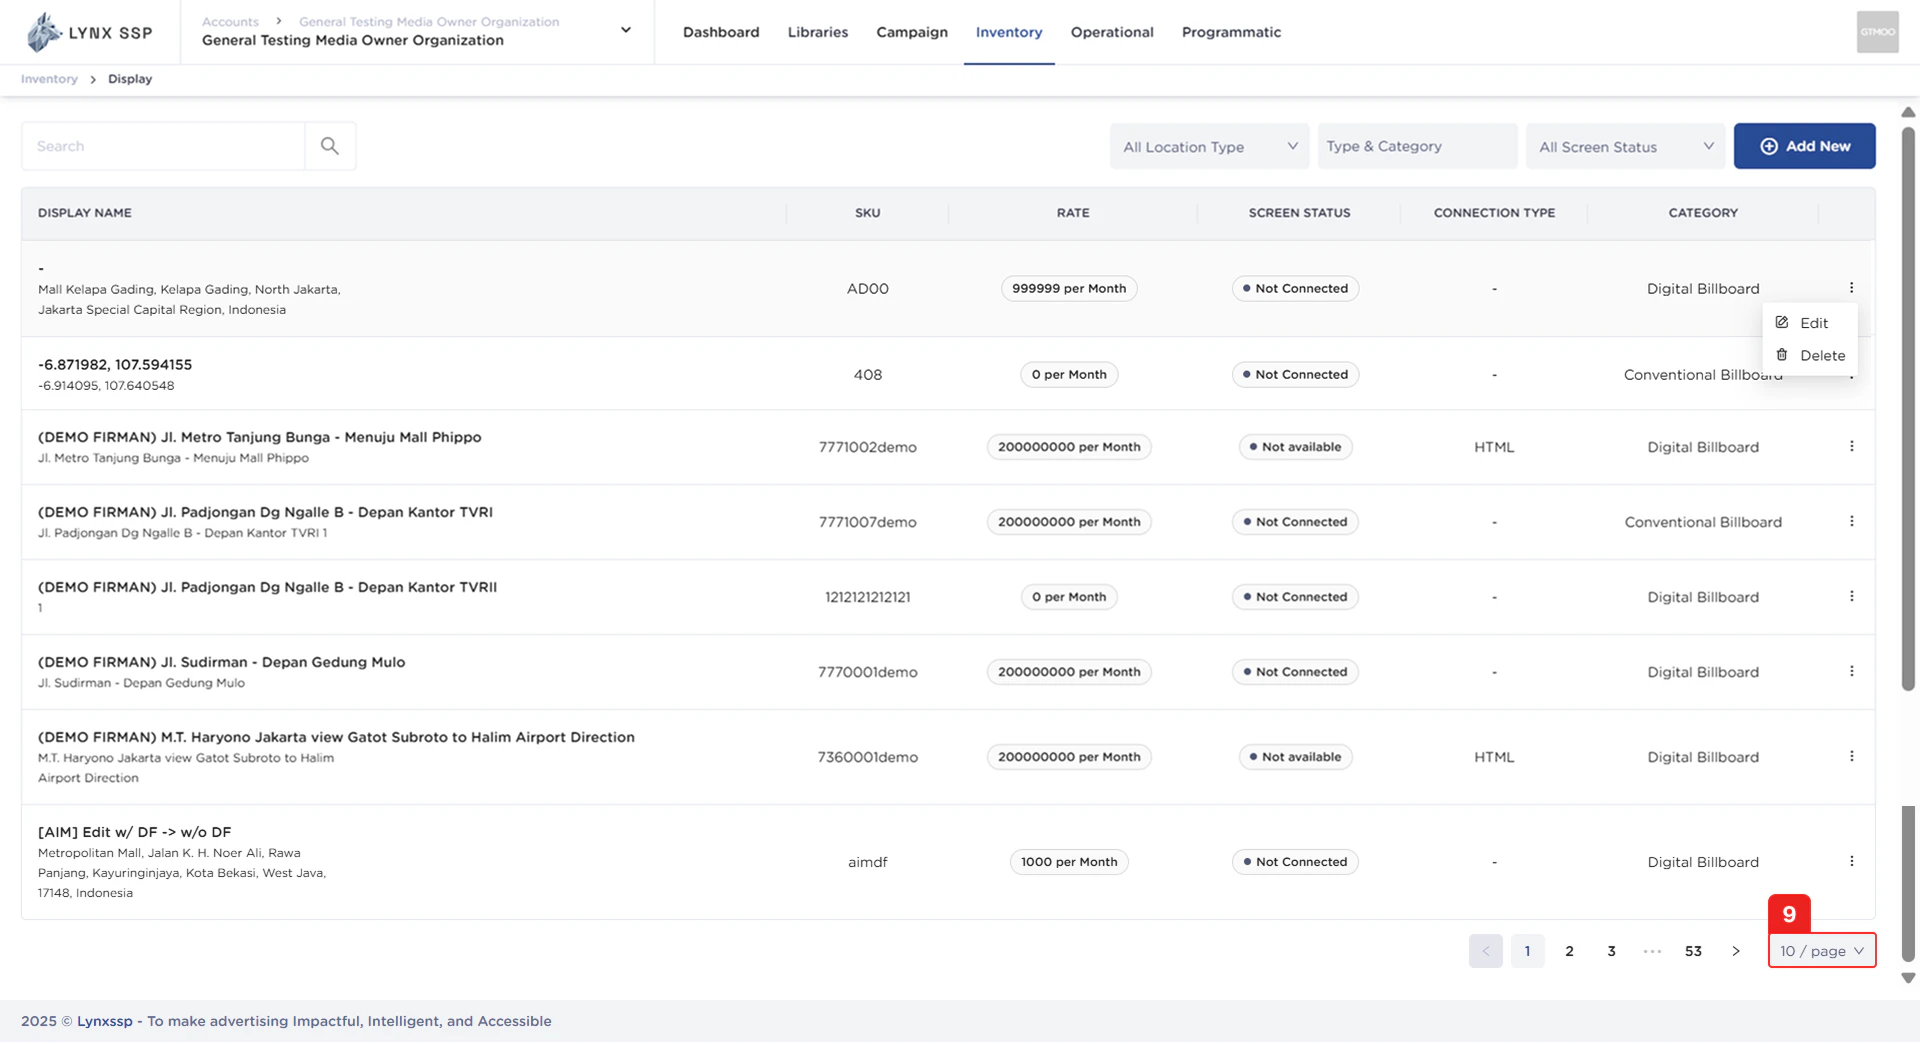
In this section, you can see all the inventory listings you have that have been successfully entered into the Lynx SSP portal. The properties that can be viewed in this table are as follows:- Display Name
- SKU
- Rate
- Screen Status (See Screen Status ↗)
- Connection Type (See Connection Type ↗)
- Category (See Specification, Type & Category ↗)
Action Button “Edit” & “Delete” Display
Using the action button, you can navigate to the Edit Page (See Edit a Display ↗) or delete (See Delete a Display ↗) that has been added.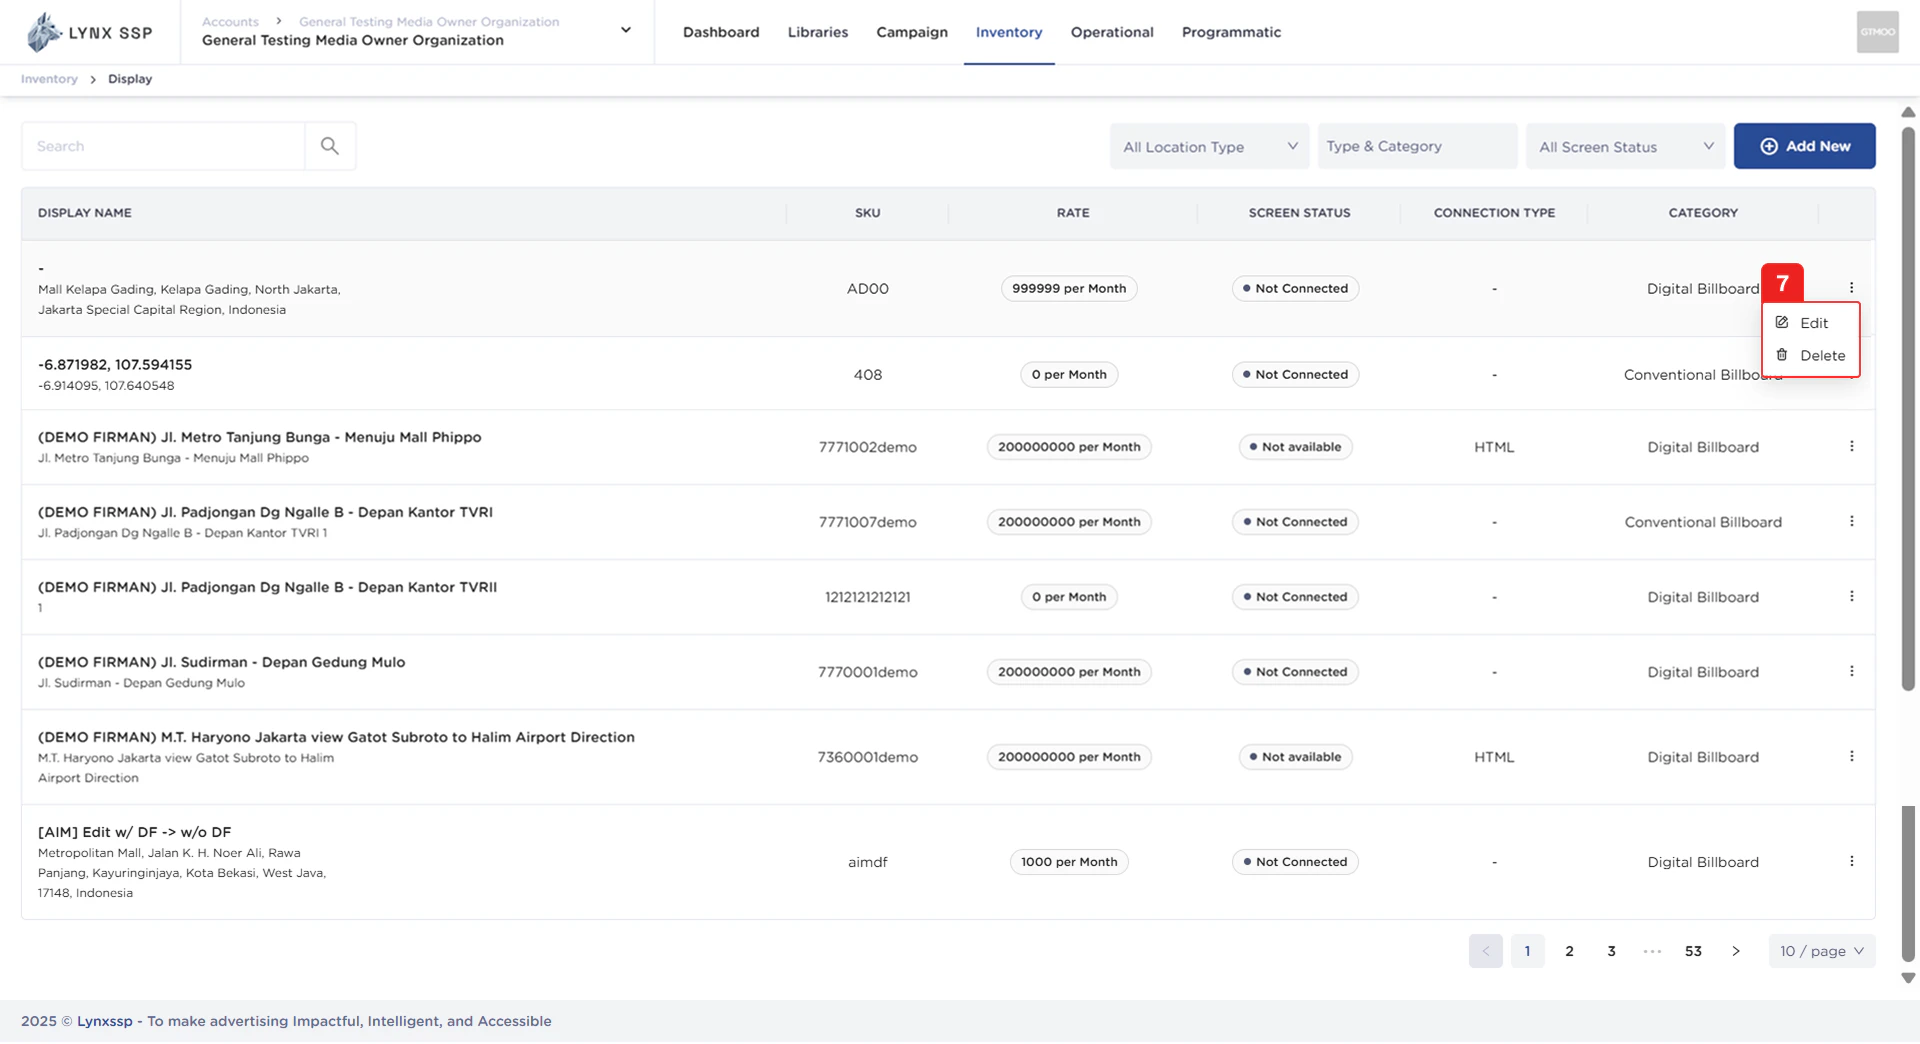
Pagination
The sequential numbers in the image below are navigation buttons that you can use to go to the next inventory display page.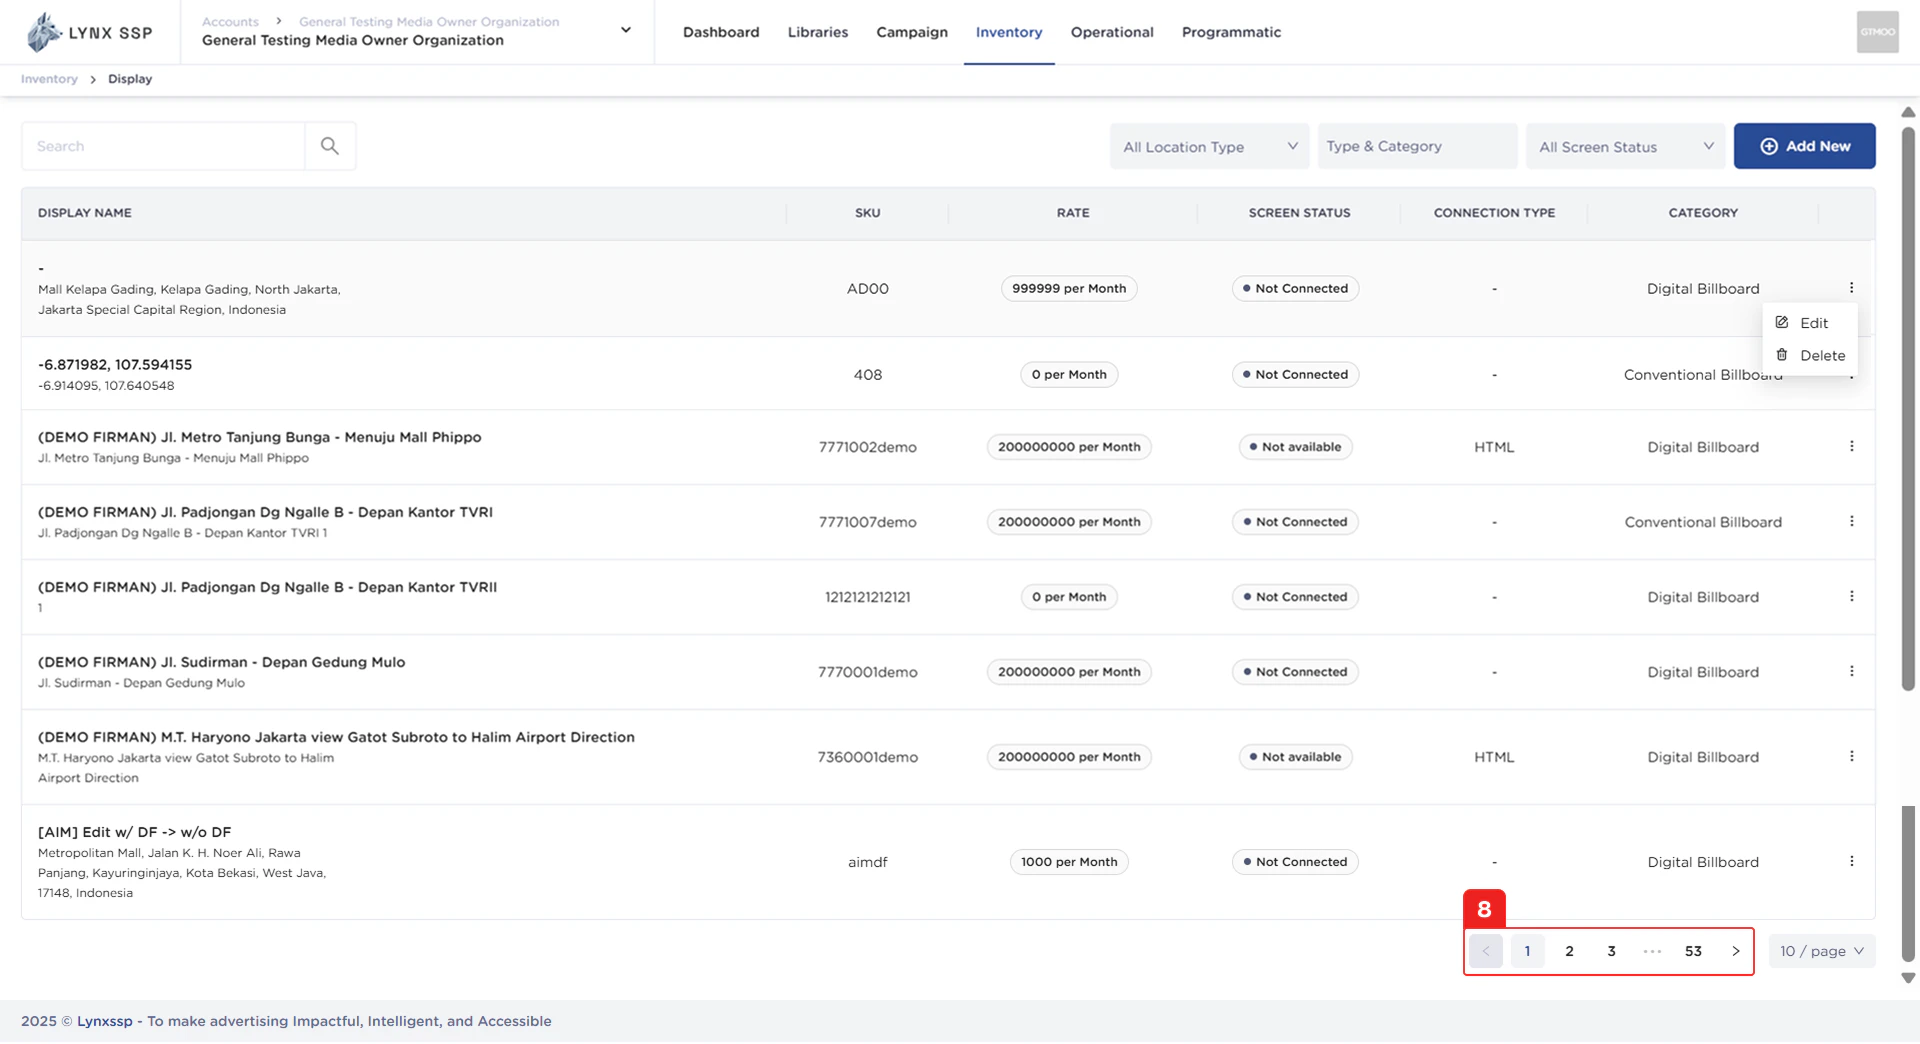
Page List
You can change the inventory list displayed. By default, it shows 10 items, but you can change it to 50 or 100.